


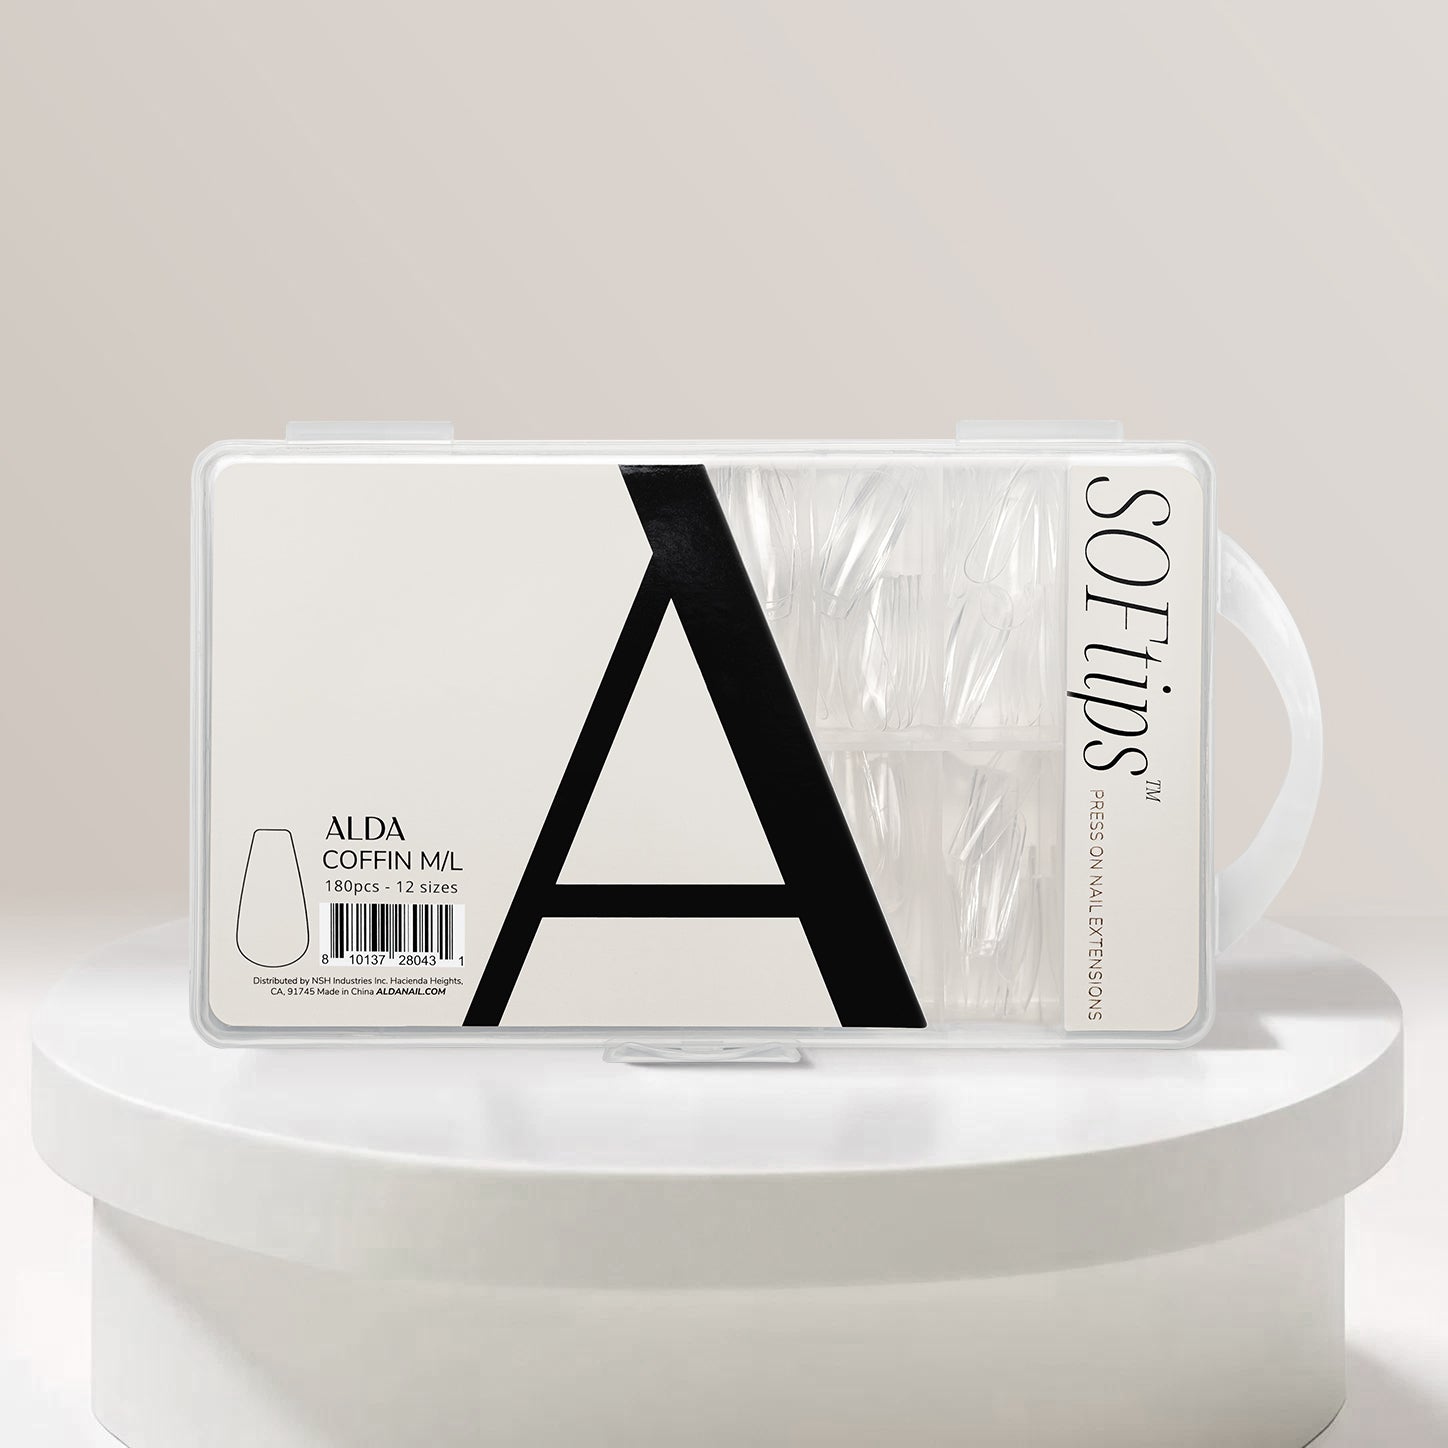
SOFtips™ Coffin M/L
- Regular price
-
$14.99 - Regular price
-
- Sale price
-
$14.99
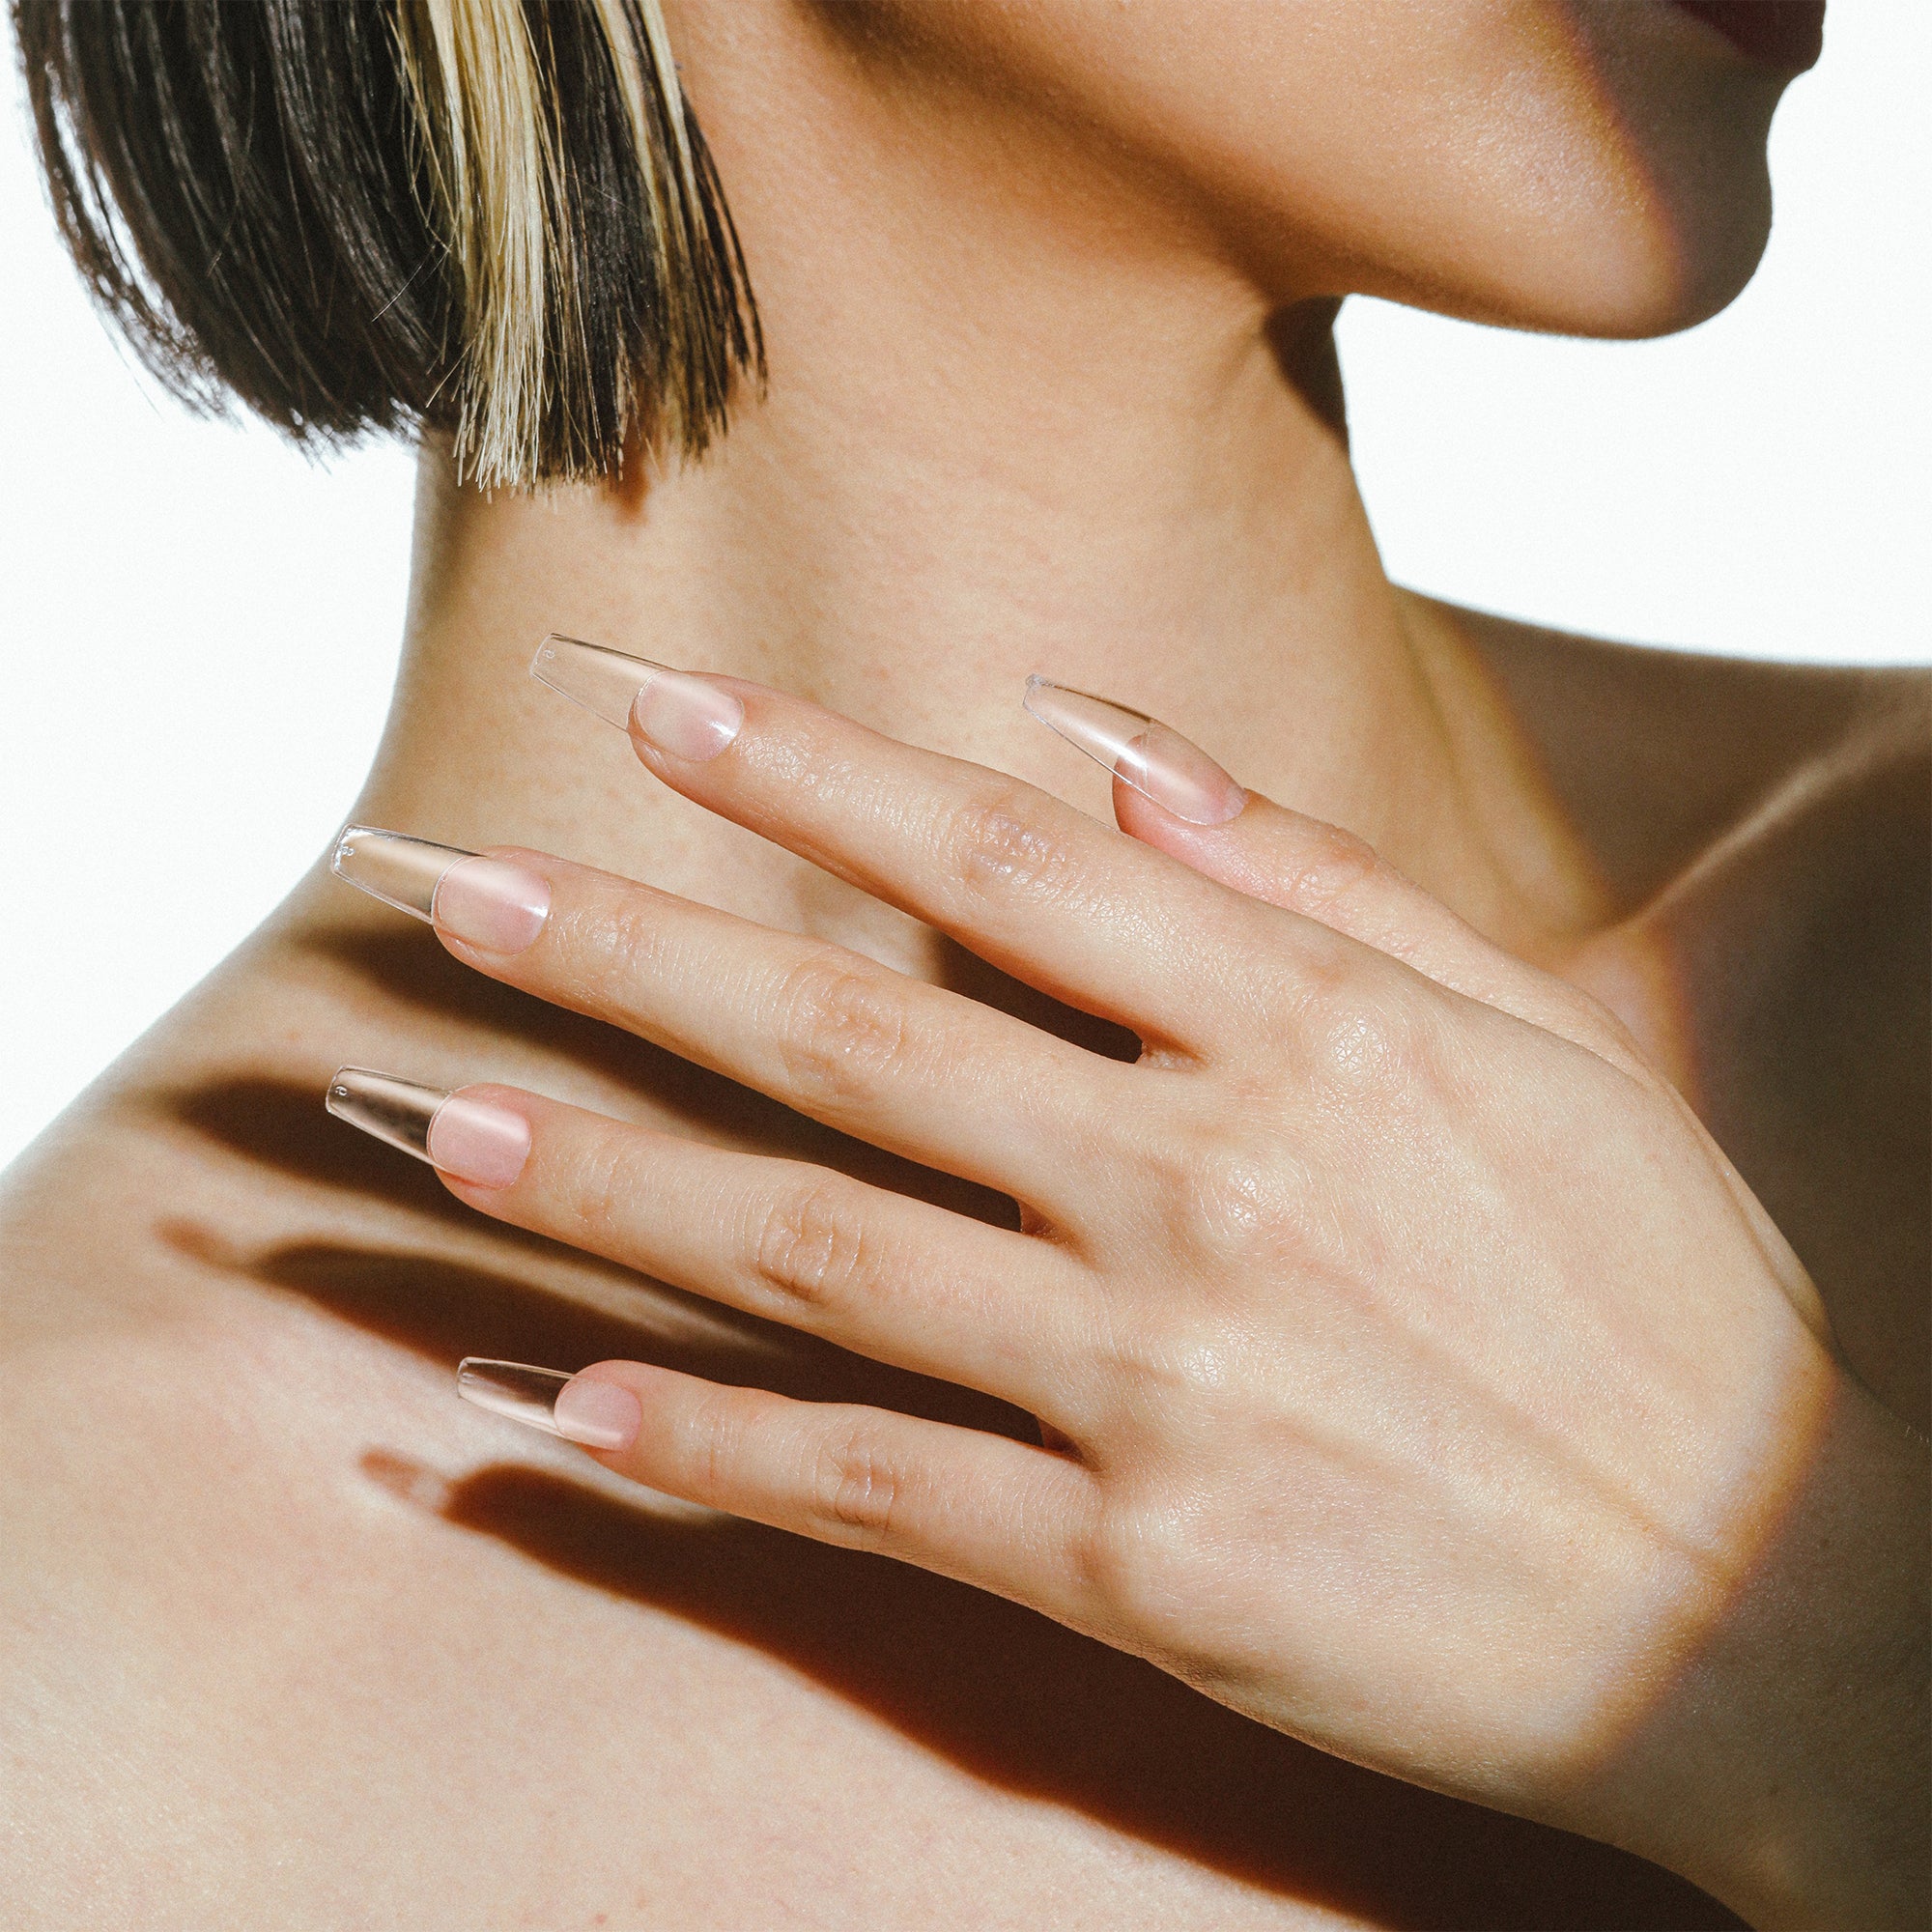
SOFtips™ – Professional Quality Press-On Extensions
Upgrade your nail game with SOFtips™, the full-coverage extensions that deliver salon-quality results at home. Unlike flimsy plastic press-ons, SOFtips™ are crafted from professional-grade materials- offering strength, durability, and structure. Paired with our SOFbond™ air-dry adhesive, there’s no need to cure gels directly on your skin- minimizing exposure to potential allergens and harsh chemicals. Get the look and feel of a salon manicure with the comfort and convenience of a lightweight yet long-lasting press-on. Creativity is limitless- Customize your nails to you!
HOW TO APPLY (TWO WAYS)
Method 1: Apply like Gel-X
Step 1 - Thoroughly wash and dry hands.
Step 2 - Push back and clean cuticles, buff nail surface and wipe down with alcohol wipes. Tip: You can use the ALDA Nail Cuticle Pusher Pen and Nail File/Buffer combo for natural nail prep.
Step 3 - Select the best-fitting nail size for each finger. Put SOFtips™ onto the nail and check the sidewalls of your nail bed. For perfect fit, the side of the SOFtips™ should not extend past or be shorter than your natural nail bed. Tip: If you are in-between sizes, simply choose a larger size and file down the edges for a custom fit.
Step 4 - Etch the underside of the SOFtips™ to create some texture and grooves for better adhesion before application. Tip: You can use the ALDA Nail Cuticle Pusher Pen to etch the underside of the SOFtips™ or use some acetone on a brush in circular motion for chemical etching.
Step 5 - Apply a thin, even layer of SOFbond™ adhesive to the back SOFtips™, no curing needed!
Place SOFtips™ at the base of the cuticle area at a 45 degree angle, then press down gently and firmly till flat. Keep holding the SOFtips™ down for 30 seconds to allow adhesive to fully dry for secure adhesion.
Step 6 - Design and paint your new nail extensions!
Method 2: Design your own press-on & apply
Step 1 - Adhere SOFtips™ to magnetic nail stand and Rose Palette to paint on nail design.
Step 2 - If using gels, fully cure with Petite LED on the Rose Palette .
Step 3 - Clean and prep natural nails with the Nail Cuticle Pusher Pen and Nail File/Buffer combo. Wipe off nail with an alcohol pad.
Step 4 - Apply pea-sized amount of the SOFbond™ to the inner base of nail tip.
Step 5 - Place SOFtips™ onto base of fingernail at a 45 degree angle and gradually lay until flat.
Step 6 - Press down and hold firmly for 15-30 seconds.
Step 7 - The perfect press-on for at-home salon-like results!
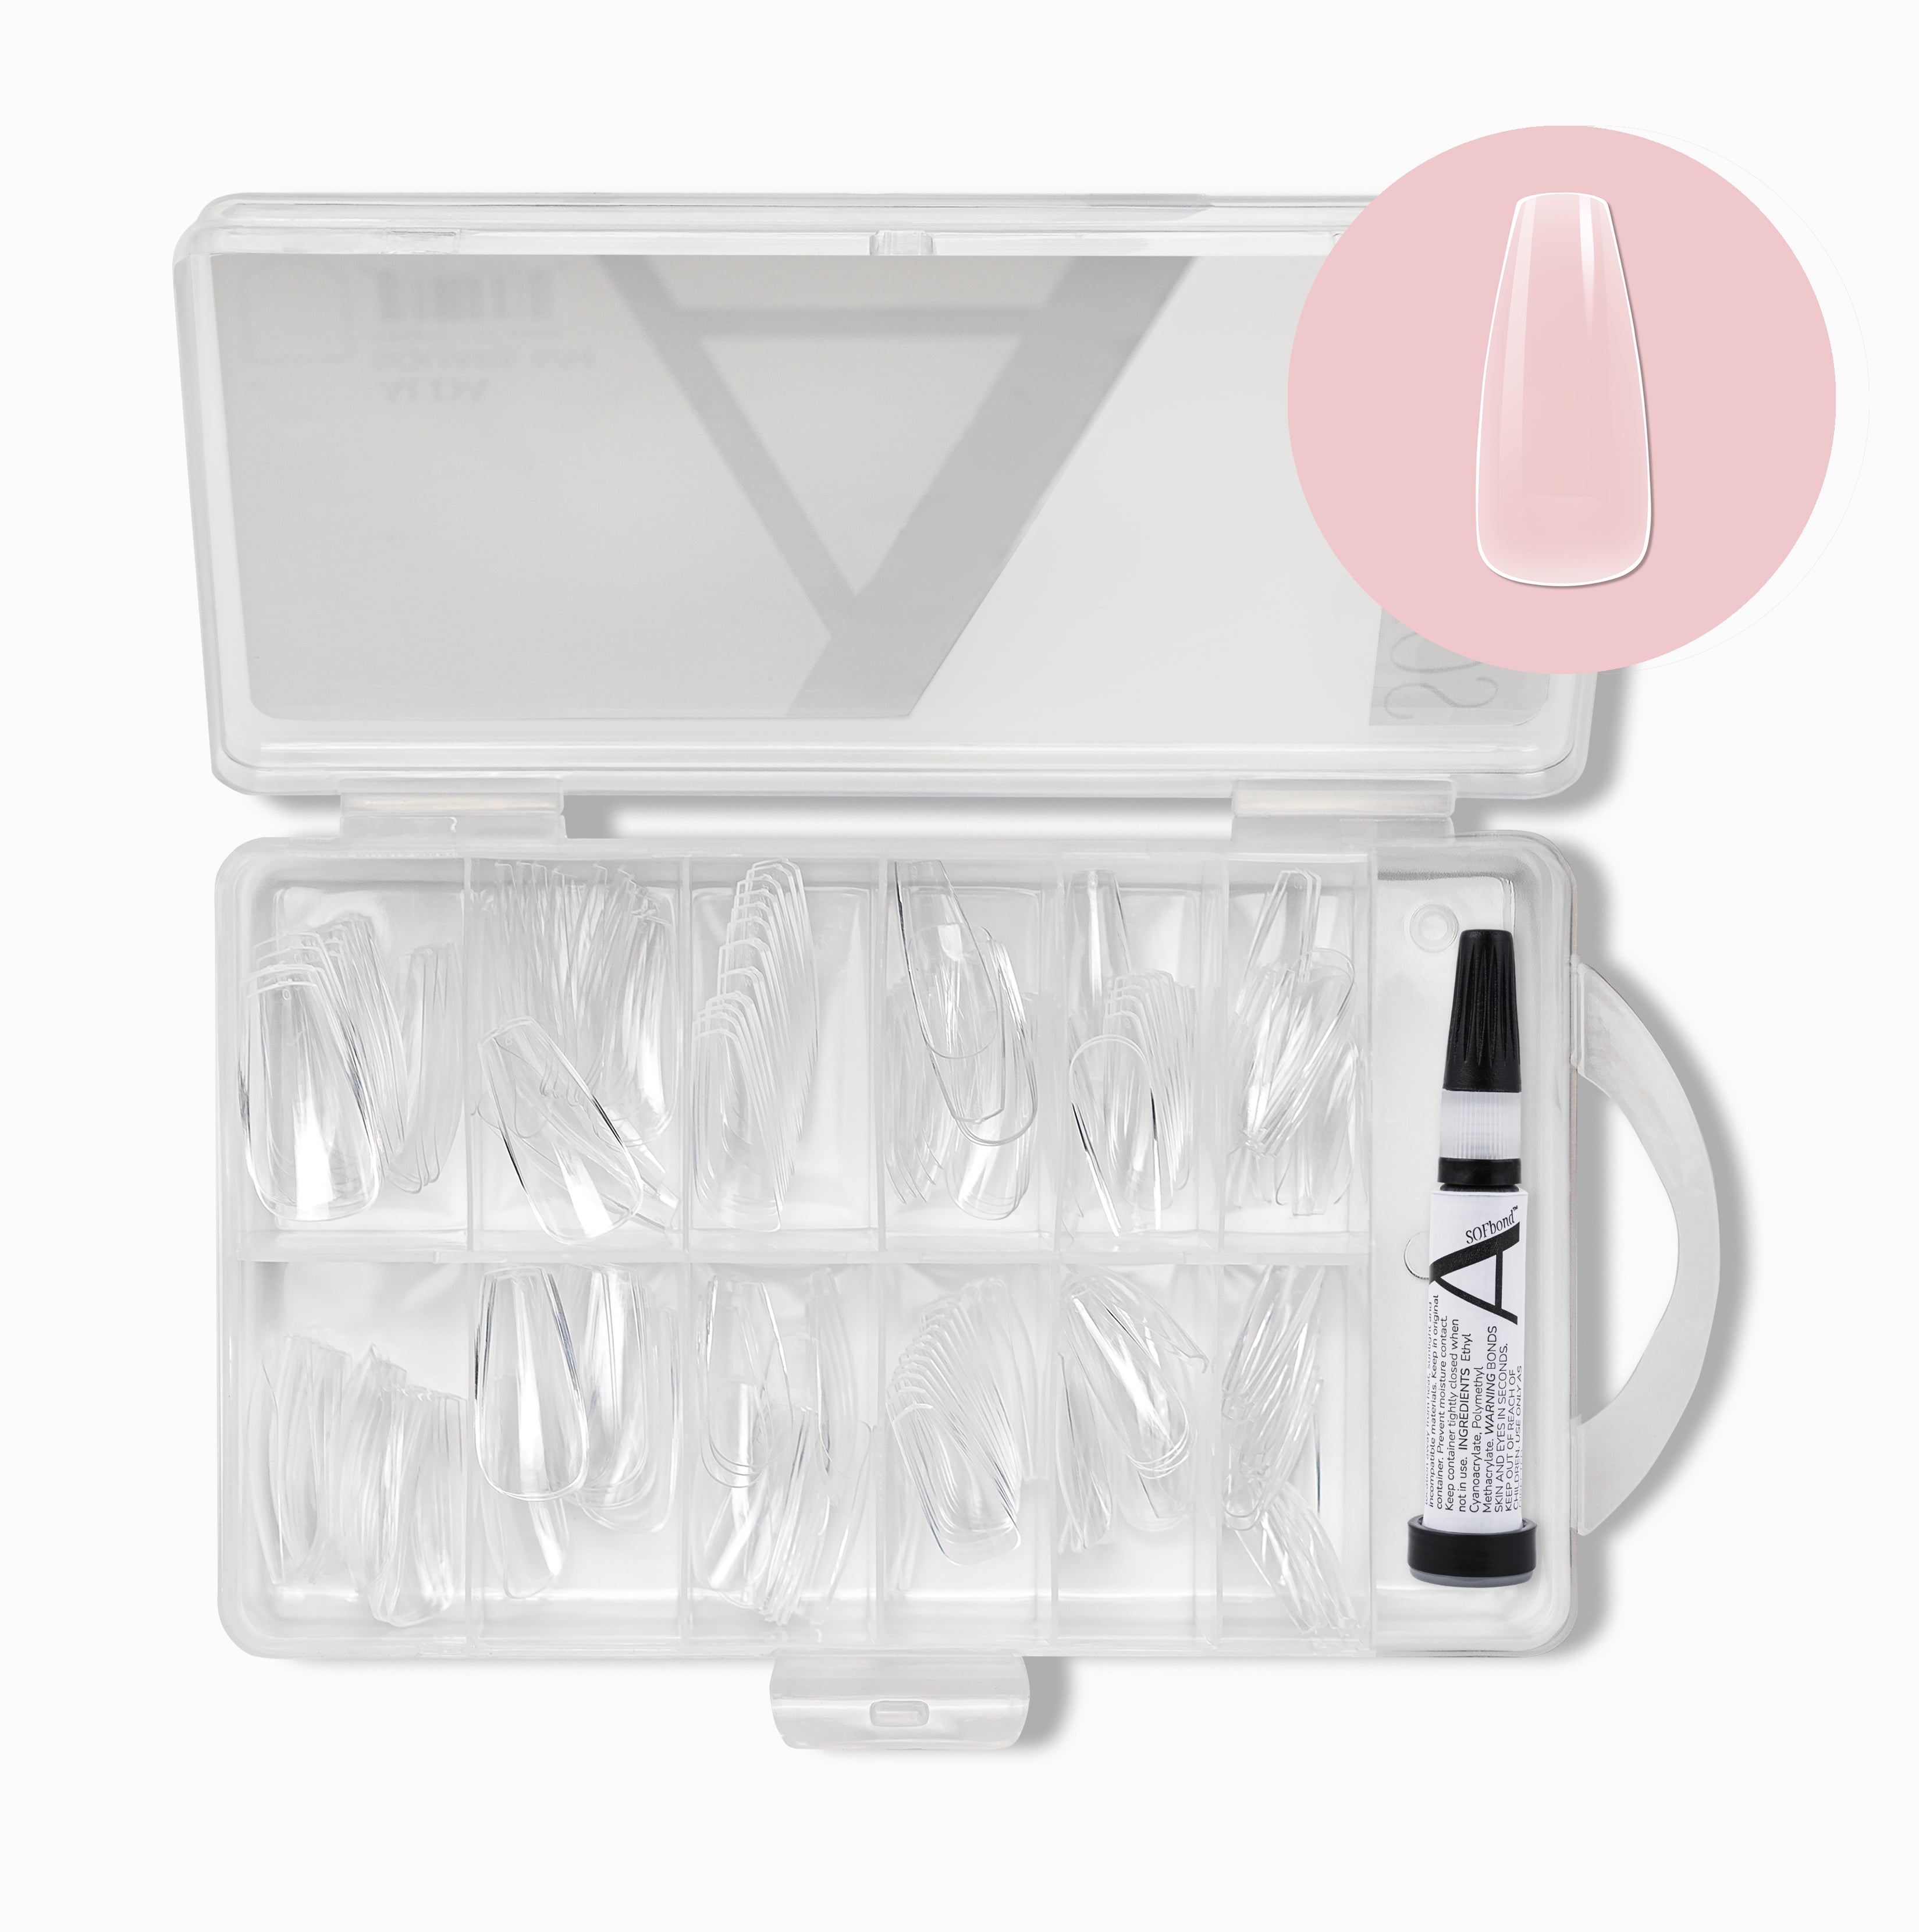
INCLUDES
- Box of SOFtips™, 180pcs - 12 sizes
- SOFbond™ 2g Adhesive
Couldn't load pickup availability

FAQs
How to prep nails before applying
- Trim nails to a short length (approximately ¼ inch growth beyond nail bed).
- Push back and clean cuticles, buff nail surface and wipe down with alcohol wipes. Tip: You can use the ALDA Nail Cuticle Pusher Pen and Nail File/Buffer combo for natural nail prep.
- Use the Nail File side of the Nail File/Buffer combo tool to gently file the nail bed. This optimizes the nail glue’s adhesion capabilities.
- Wash hands thoroughly with soap and warm water.
How to select and place nail tips
- For each hand, individually match the SOFtips™ finger by finger by placing the tip on the dry nail and test for fit. The SOFtips™ should fit comfortably on the surface of your nail without overly exceeding the cuticle area.
- Layout each tip left to right, starting with left pinkie and ending with left thumb. Repeat steps for your right hand.
Tip: If you are in-between sizes, simply choose a larger size and file down the edges for a custom fit.
How to apply SOFtips™
Method 1: Apply like Gel-X
- Etch the underside of the SOFtips™ to create some texture and grooves for better adhesion before application. Tip: You can use the ALDA Nail Cuticle Pusher Pen to etch the underside of the SOFtips™ or use some acetone on a brush in circular motion for chemical etching.
- Apply a thin, even layer of SOFbond™ adhesive to the back SOFtips™, no curing needed!
- Place SOFtips™ at the base of the cuticle area at a 45 degree angle, then press down gently and firmly till flat. Keep holding the SOFtips™ down for 30 seconds to allow adhesive to fully dry for secure adhesion.
- Design and paint your new nail extensions!
Method 2: Design your own press-on & apply
- Adhere SOFtips™ to magnetic nail stand and Rose Palette to paint on nail design.
- If using gels, fully cure with Petite LED on the Rose Palette .
- Clean and prep natural nails with the Nail Cuticle Pusher Pen and Nail File/Buffer combo. Wipe off nail with an alcohol pad.
- Apply pea-sized amount of the SOFbond™ to the inner base of nail tip.
- Place SOFtips™ onto base of fingernail at a 45 degree angle and gradually lay until flat.
- Press down and hold firmly for 15-30 seconds.
- The perfect press-on for at-home salon-like results!
How to remove
To prevent damage, avoid forcing or popping off nails without prior soaking or use of remover solution.
Gentle Soak-Off Method - Oil & Warm Water
Soak your nails in warm water mixed with a few drops of cuticle oil for 10–15 minutes. The oil helps break down the glue, allowing you to slowly slide off each nail. Gently lift around the edges with an orange stick or cuticle pusher. If needed, re-soak to avoid forcing, which helps prevent any damage to your natural nails. This method is ideal for keeping nails and cuticles hydrated during removal.
Acetone Removal
Gently lift around the edges with an orange stick or cuticle pusher. Drop nail polish remover, acetone, or nail glue remover solution into the lifted space between the tip and natural nail. Allow remover to soak into the glue for 30-60secs. Lift nail tip off nails, and buff surface of the nail to remove any remaining residue.